Setting Up Genie With an *Existing* Dubsado Form
New Feature! Our templates now use our latest script which is compatible with Dubsado 3.0 and comes with our latest one-click publish template experience.
Important: If you already have a Genie 4.0 template, and you want to use Dubsado 3.0 or our new one-click publish feature, check out How to Update your Existing Dub-ins Template to Dubsado 3.0 to successfully update to the new script.
You’ll need to add an HTML block at the top of your Dubsado form, copy the following Initial Script and paste it inside the block:
Once you’ve added the Initial Script above, click Save form in the top right hand side of your Dubsado form and follow the directions on the blue block that should display after adding the Initial Script.
Important: Do not remove the Initial Script from your form. The Initial Script HTML block is required in order for your form and Genie to be able to “talk” to one another. Make sure to keep this block intact for the form to work correctly.
Note: If you are working from an existing Questionnaire form, check out Using Genie with a Questionnaire.
How to Get Started:
- Add Elements
- Beneath the top HTML block (the initial script you copied and pasted above), add as many Dubsado elements as you'd like (e.g., Text Box, Short Answer, Package, etc.).
- Save your Dubsado form.
- You can always come back to add more elements later.
- Open Your Public-Facing Form
-
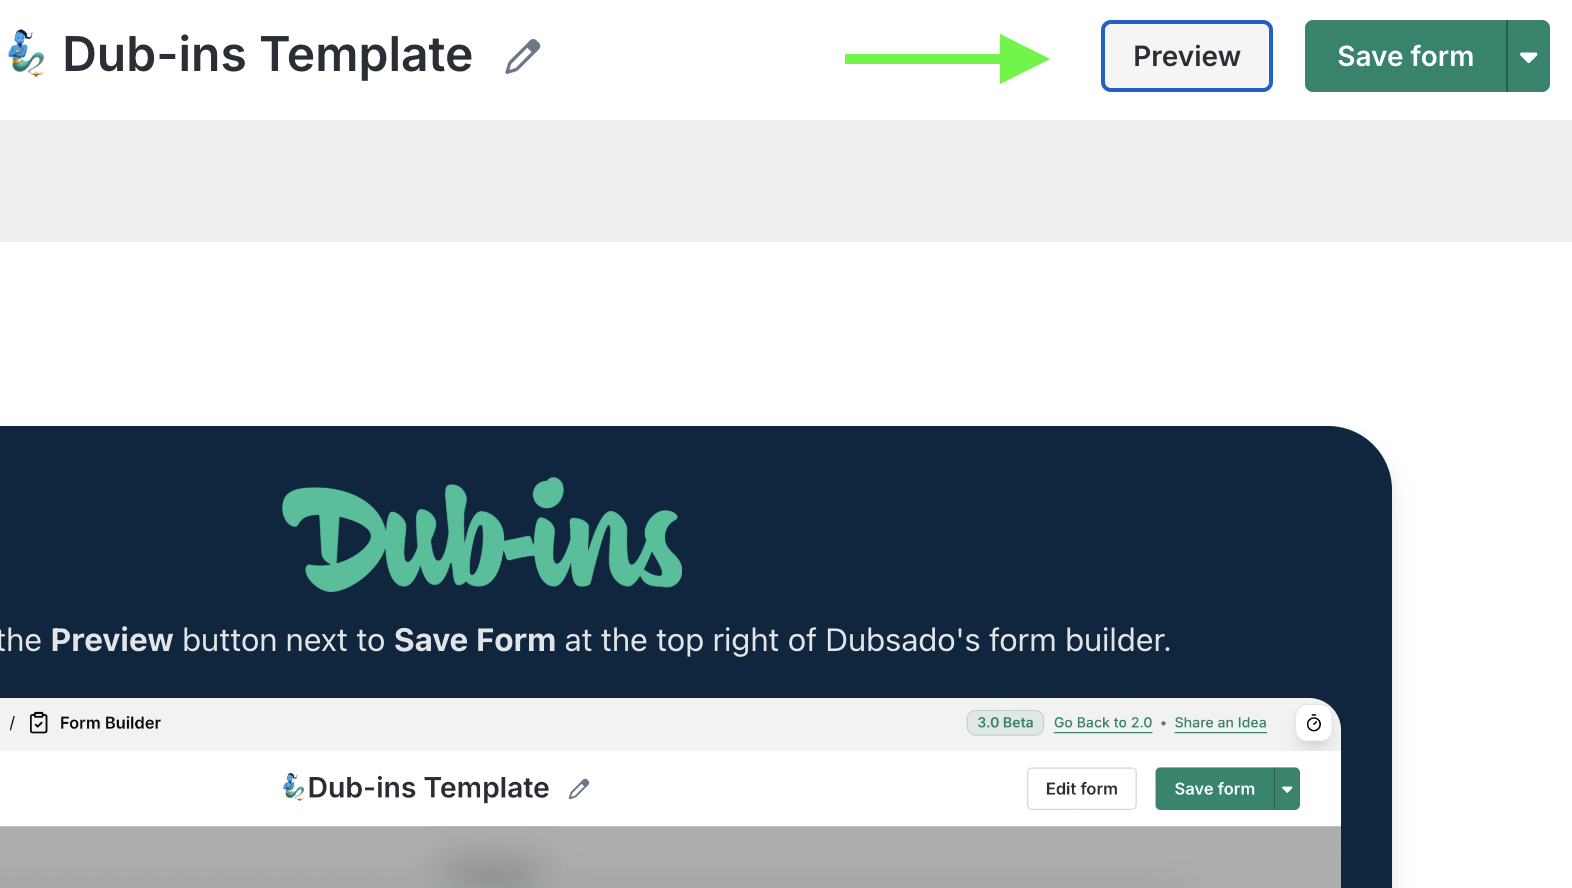
Click the Preview button inside of Dubsado’s form builder:
Important: If you’re still using Dubsado 2.0, you won’t see the blue instruction block. That’s totally fine. Just click Preview to open the pop-up, which will guide you to your public-facing form.
-
- Open your public-facing form
-
After clicking Preview, you’ll see the following popup:

- Click the Open public-facing form button.
-
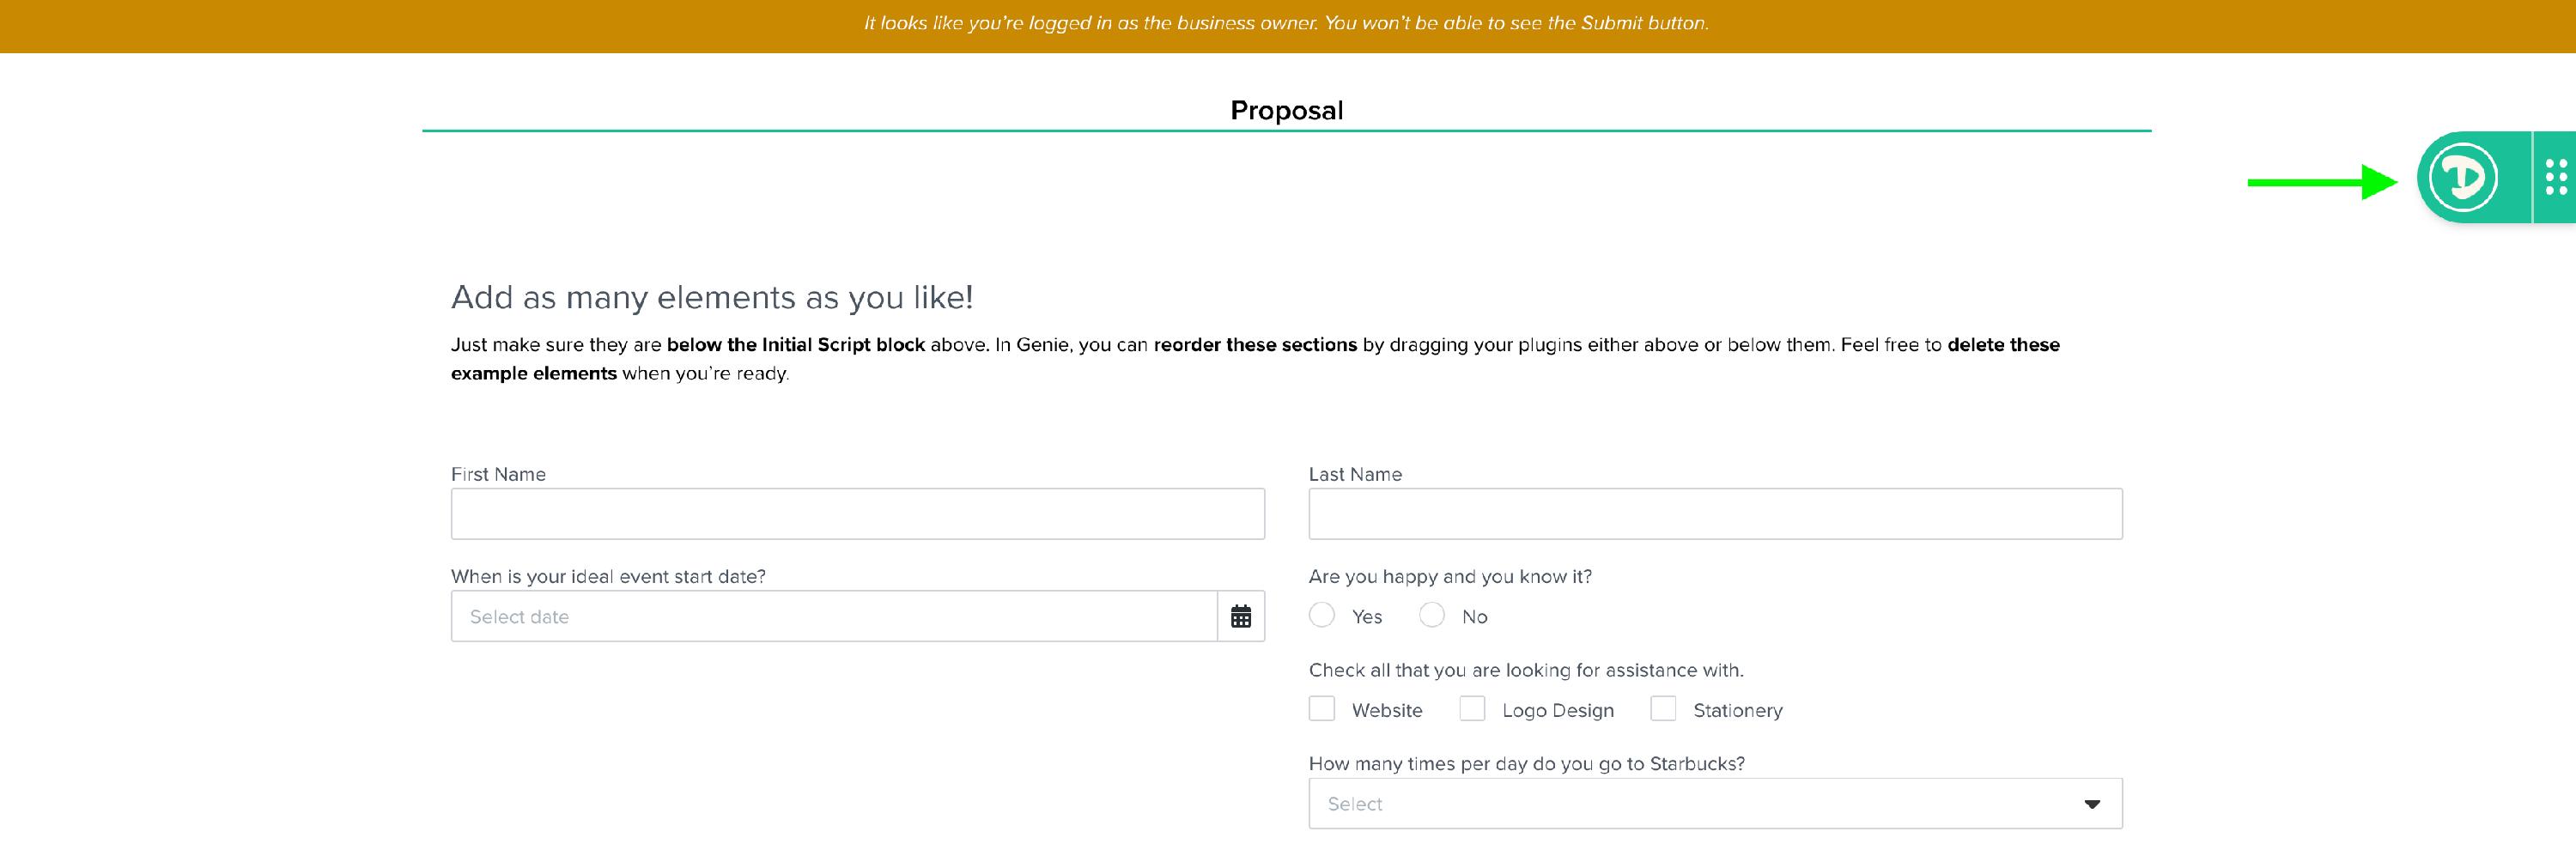
- Enable Dubsado Side Editing (DSE)
-
On the public-facing form, click the Dub-ins logo on the right side to toggle DSE.
-
- Update & Save
- As you add elements to your Dubsado form, always click Save Form to preserve your changes.
-
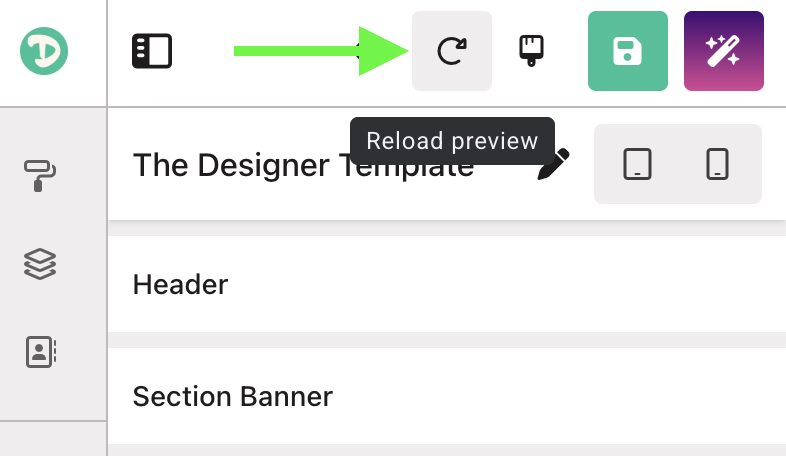
Back over on Genie, click the Reload Preview button on your public-facing form to see your changes reflected:


Troubleshooting
If for some reason, you don’t see the popup after clicking Preview, you can still access your public-facing form by following these steps:
- Open Your Public-Facing Form
- Click this link: https://hello.dubsado.com/public/form/view/your-form-id-here.
- Copy Your Form ID
- Locate and copy your Dubsado form ID. What Is My Form ID?
- In the address bar of the new tab you just opened, find the text
your-form-id-here. - Replace it with the form ID you copied.
- Enable Dubsado Side Editing (DSE)
- On the public-facing form, click the Dub-ins logo on the right side to toggle DSE.
Things to note
- Preview Flash: When your template loads, it will show a millisecond preview of your form before your Genie template loads. To remove this preview flash—and you’re Setting up Genie with an Existing Dubsado form—the CSS to remove this flash has not been added to your form (unlike if you’re copying our Genie Template from a new Dubsado form). To add the CSS, copy the following code and paste it in your Dubsado form (under Form Styling > scroll down > Edit CSS).
.client-view-tabs, .form-viewer, #diWCShell { visibility: hidden; } - Blank Form Issue: If you remove your Initial Script HTML block, your public-facing form will show up blank. In order for your form to show all of your elements, either remove the CSS above or add the Initial Script back to your form.
- Use The Default Domain For Editing: To enable Dubsado Side Editing (DSE), you must use Dubsado's default domain when editing your template.
- Use a URL like this: https://hello.dubsado.com/public/form/view/your-form-id-here
- Do not use custom domain URLs, such as: https://portal.dub-ins.com/public/form/view/your-form-id-here
- Why? Your custom domain won't support Dubsado Side Editing during the editing process. But don't worry—once you've finished editing and added your magic to your form, your template will display perfectly on your custom domain.
- Need Help?: We’re here for you! Click the menu icon in Genie. From the slide-out menu, choose Quick setup guide to revisit the basics of using Genie or click the chat at any time to speak with one of our team members.